Plixus Coupling And Pairing
For more information on the installation of the WCAPs and WAPs in the Plixus network, see the Plixus user guide.
Plixus coupling is only available for the Technician user role.
General Information
It is possible to combine wired and wireless units in a Plixus network by adding one or more Confidea G3 WCAPs and Confidea G4 WAPs connected via 100 Mbps Ethernet cables.
It is not necessary to have multiple WAP/WCAPSs actively connected together in one network.
WAP G4 devices only work in 100 Mbps-powered Plixus mode. All devices in the same branch/loop should also be 100 Mbps.
Coupled / Uncoupled Mode
An access point in the network can be in coupled or uncoupled mode. The coupling can be enabled or disabled from the web interface (see section below Coupling / Uncoupling an Access Point).
When the Central Unit detects a device that was already known, the last known settings for this specific device will be automatically selected.
Note that AUX IN, AUX OUT, Dante IN and Dante OUT of the access points will not be available when in coupled mode.
Neighbours
In the network, an access point has two types of neighbours: the other access points in the Plixus neighbours, as well as the connected delegate units.
However, a delegate unit has only one type of neighbour: access point to which it is connected.
Settin up of a large network with G4 wireless devices could be slow as a lot of information need to be broadcasted to the units (meeting information, delegate information, etc.) and the wireless broadcast bandwidth will be restricted.
Coupling / Uncoupling an Access Point
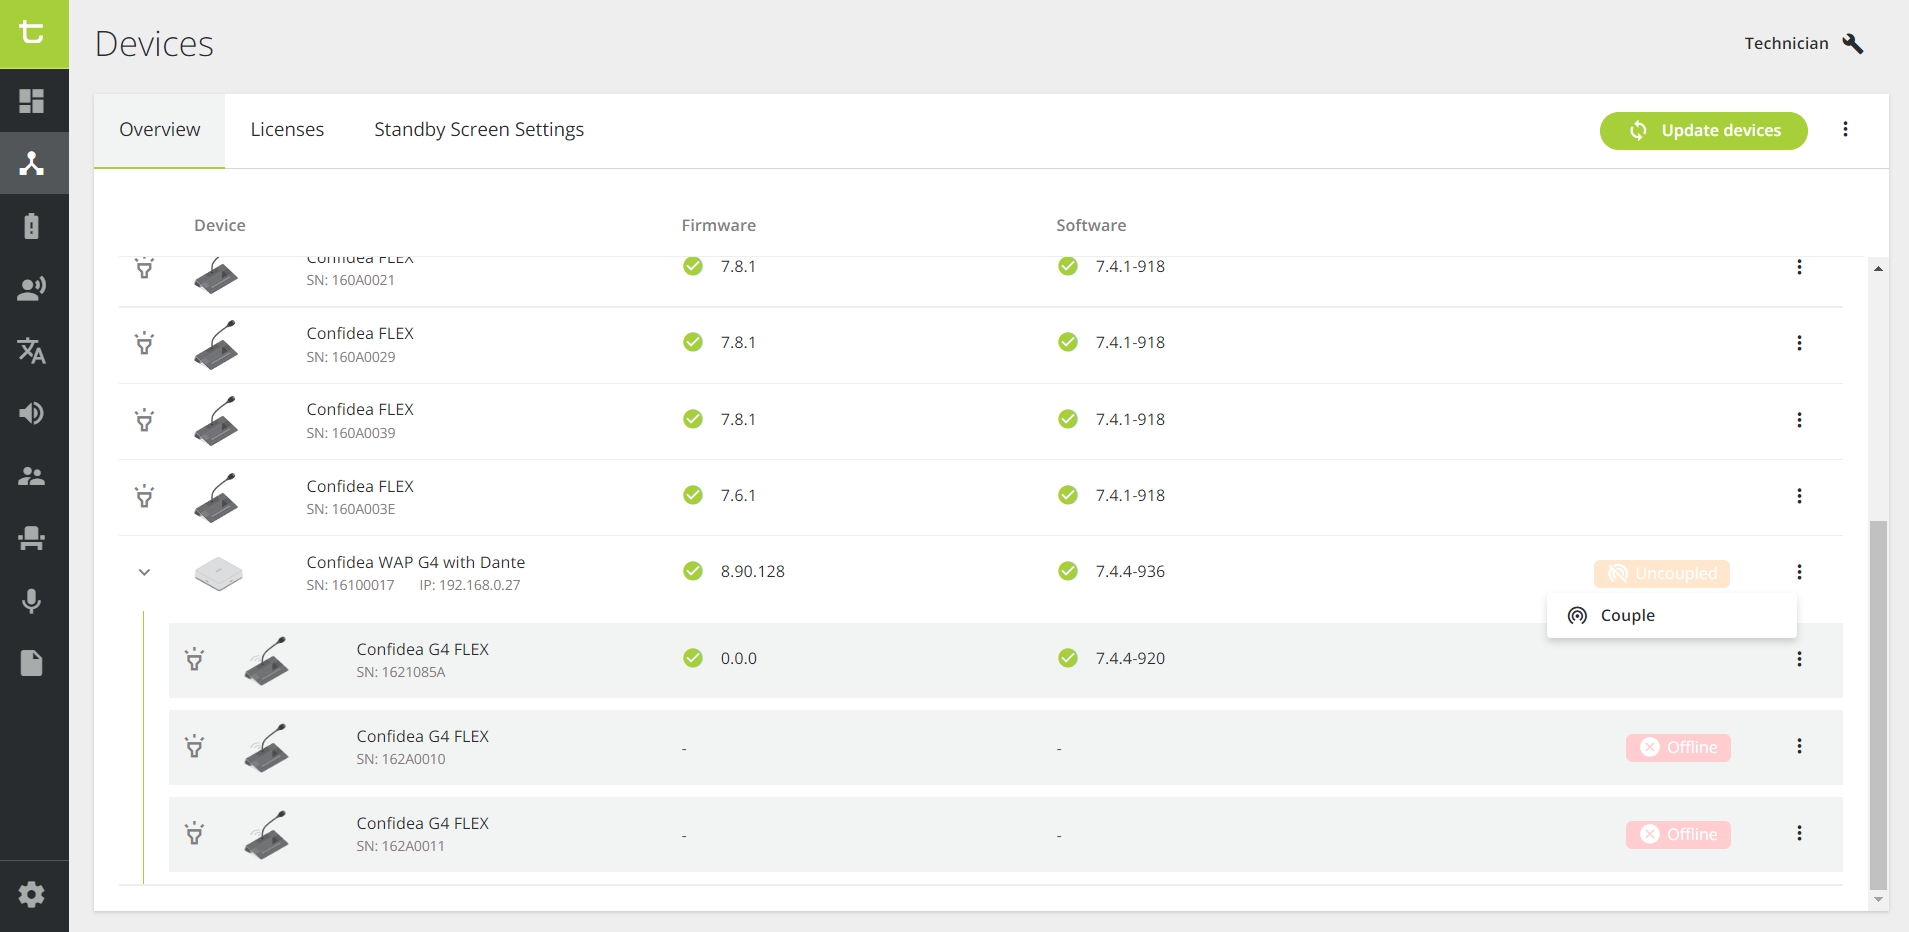
Go to the Devices page and select the Overview tab. You can see which access points are known by the Central Unit, as well as their coupling state ('Coupled' or 'Uncoupled'). You can also change the state of these devices by clicking on the More icon ![]() and selecting either Couple or Uncouple. If the device was already known, the system will use the last known settings of this device.
and selecting either Couple or Uncouple. If the device was already known, the system will use the last known settings of this device.
All access points, whether coupled or uncoupled, have a visible IP address displayed. When you click on the IP address in coupled mode, providing you have a technician role, you will have access to the following three pages only:
-
Dashboard with limited functionalities,
-
Settings that must be done locally in the WAP LAN and not on the Central Unit,
-
Wireless Channels that must also be set locally.
In coupled mode, the date and time of the Central Unit will be applied to the access points and associated delegate units.
In coupled mode, the standby screen of all units will be saved, but the standby screen screen of the Central Unit will be applied and will be the same on every unit of the network.
Pairing
Wired and wireless pairing are only available for the Technician user role.
Pairing Mode
The pairing mode is the same for all connected access points, wired and wireless.
Go to the Devices page. On the Overview page, click the ![]() Wireless pairing button. The Wireless pairing dialog box opens.
Wireless pairing button. The Wireless pairing dialog box opens.
In the Select access point column, you can see all the access points that are in coupled mode. Click on an the WAP or WCAP of your choice to see all the devices associated with it (if any) in the Device list column.
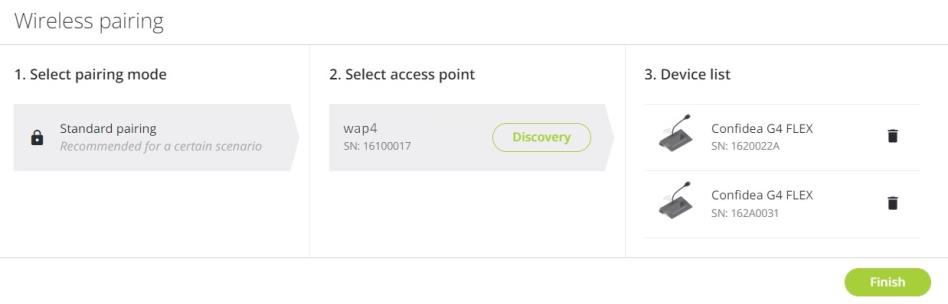
Figure 1-1: Wireless pairing dialog box
Step 1: Pairing Mode
In this column, you can see how the access point detects the wireless units. There is only one authentication mode: Standard pairing.
Step 2: Switch On / Off the Discovery Mode
After choosing Standard pairing, you can switch on/off the Discovery for every access point, one by one. Switch on the Discovery mode by clicking on the ![]() button, or switch it off it by clicking on
button, or switch it off it by clicking on ![]() .
.
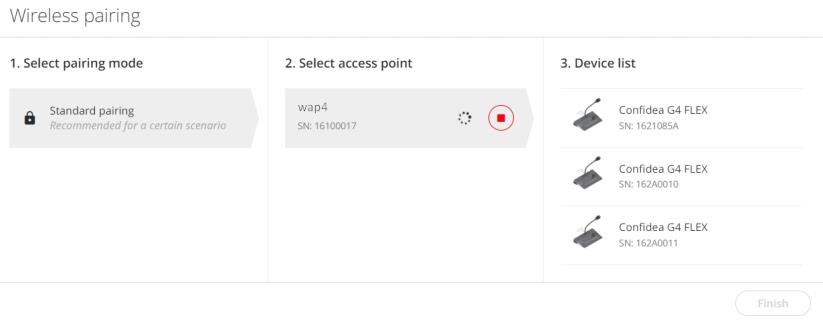
Figure 1-2: Wireless pairing of Confidea G4
When the Discovery is ON, every Confidea Wireless G4 unit that requests access, is connected. When the Discovery is OFF, only the units from the Device list can connect. This is the recommended setting.
Besides, when the Discovery has been switch on for one of the access points, it should be switched off for the other access points.
Switching on the Discovery mode is not recommended when you have multiple access points because you cannot know to which one the wireless units will try to connect.
Pairing Button 
Alternatively on the WAP G4, you can also use the physical pairing button on top of the WAP to switch Discovery on or off:
- By shortly pressing the button, you switch on/off the Discovery mode.
- By pressing the button for more than 2 seconds, the list with known wireless units is deleted and the Discovery mode is switched on for this access point.
Step 3: Devices
The Device list is created by automatically saving all the units that have connected with Confero when the Discovery mode was switched on. You can delete units from the list by clicking ![]() for each unit individually, or select Clear all to delete all units.
for each unit individually, or select Clear all to delete all units.
Click Finish to end the pairing process.
View wireless devices in Confero
On the Overview page, you can see the access points and the connected wireless units. Per access point, you can see the authentication method. If you click the more icon![]() next to the wireless unit, you can uncouple the device from the access point by clicking
next to the wireless unit, you can uncouple the device from the access point by clicking ![]() Uncouple.
Uncouple.
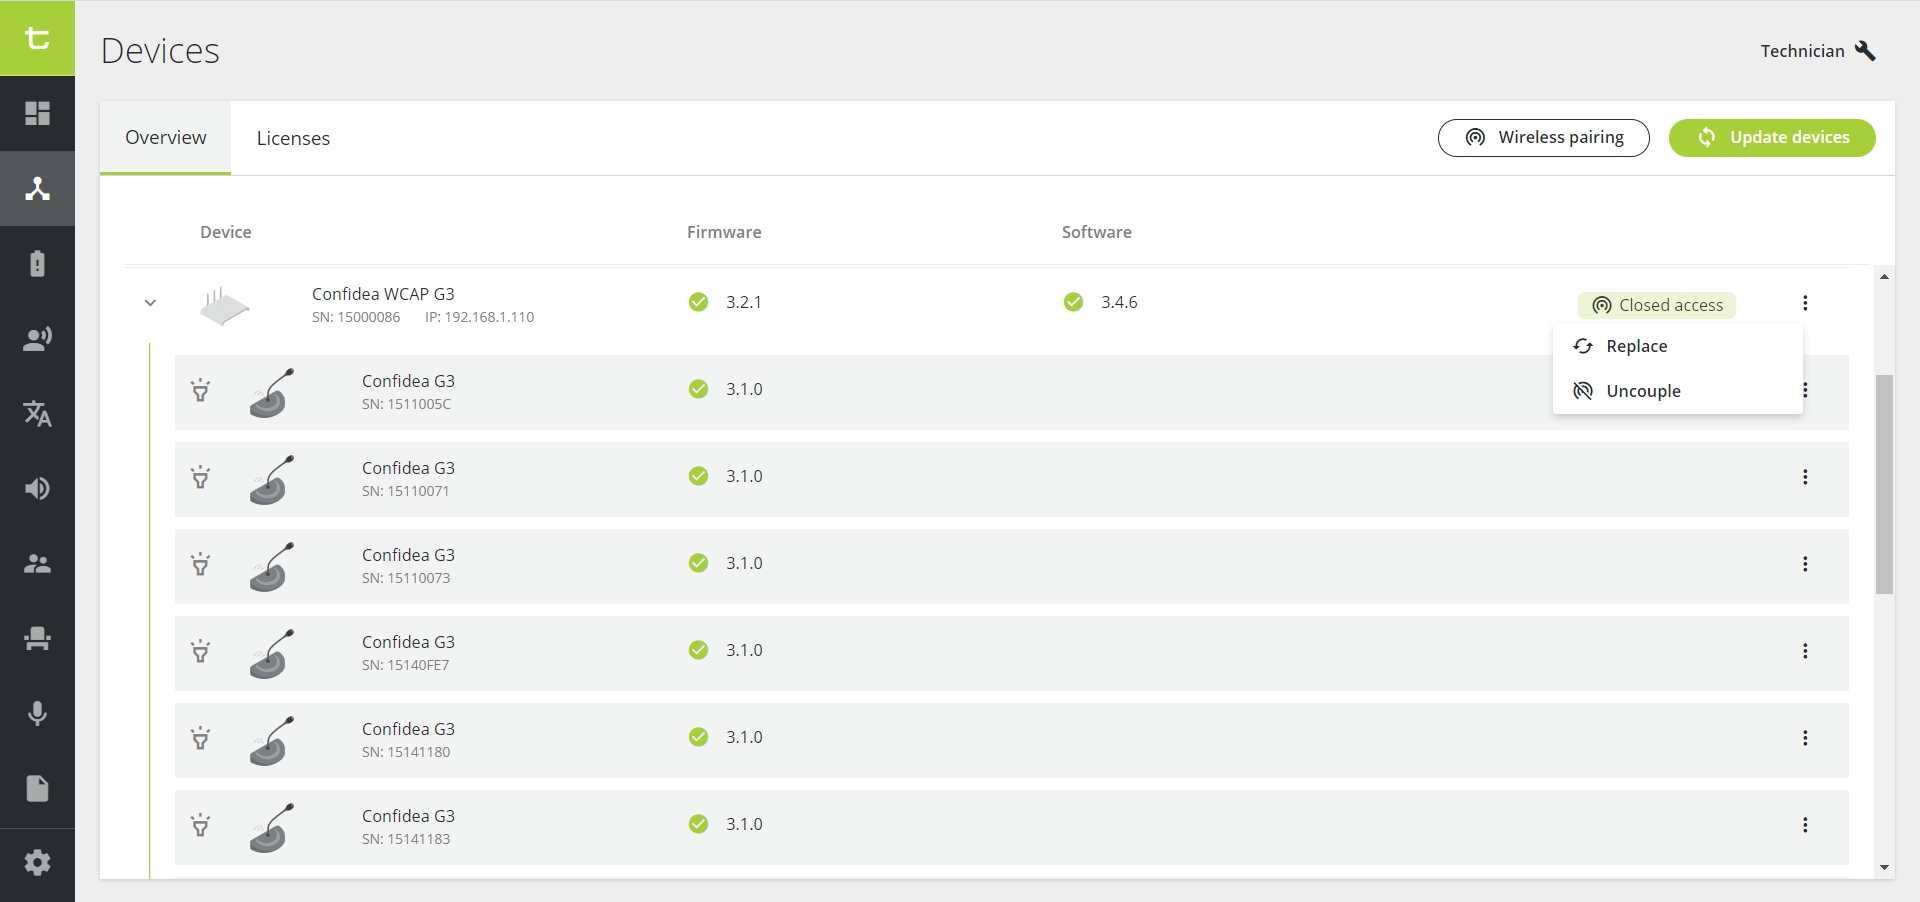
Figure 1-3: Overview of access points and connected wireless units
Delete / Turn off devices
On the Devices pages, you can also delete the devices that are connected to the access point. If you click on the more icon ![]() in the top right corner next to Update devices, you can choose to either delete offline devices from the list or simply turn off all the units.
in the top right corner next to Update devices, you can choose to either delete offline devices from the list or simply turn off all the units.
It is also possible for the Operator/Chairperson to turn off all G4 units on the Dashboard page.
Diagnostics
In coupled mode, the diagnostics of both access points and delegate units are only visible in the Central Unit.
In uncoupled mode, only the diagnostics of the access points are visible in the Central Unit. The delegate units will appear as offline.
Refer to the Diagnostics section for more information.