Devices
The Devices page has two tabs:
- Overview: gives an overview of all devices detected by the system.
- Licenses: place where you can manage all device-specific licenses such as the licenses on the Confidea FLEX.
- Standby Screen Settings: place where you can upload, edit and remove the standby image of the units.

Figure 1-1: Landing page of the Devices section
Overview
The Overview page shows all devices detected in your Plixus network. Per device, you can see the following information or perform these actions:
-
 Wireless pairing: click the icon to open the wireless pairing window. In this window, you can configure the Discovery mode in Standard pairing. For more detailed information on wireless pairing, please refer to the topic Plixus Coupling And Pairing.
-
 Highlight a device: click the icon to highlight the device in the setup. The microphone LED of the unit lights up so that you can see which device it is inside your room.
Figure 1-2: Device list
- Small isometric image of the device with device type and serial number.
- Clickable IP address of the access point (in coupled mode).
- Firmware and software version: shows the latest version installed on the device
-
 More icon: click this icon to view more options:
- Replace device: when a device is defective, you can easily change it for a different functional one. First remove the faulty device from the setup, then click the Replace button, enter the serial number, and press Replace. Now add the new unit to your network. It doesn't need to be in the same location as the defective unit (branch/loop).
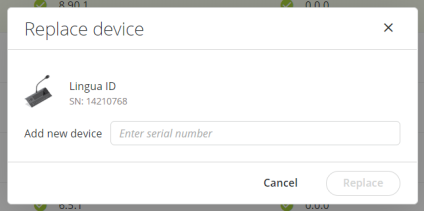
Figure 1-3: Replacing a device
You can find the serial number of the unit on the bottom of the device. It is best to check that you are replacing the correct unit by checking the serial number of the faulty device and the one listed in Confero.

Figure 1-4: Sticker with serial number of the device
- Replace device: when a device is defective, you can easily change it for a different functional one. First remove the faulty device from the setup, then click the Replace button, enter the serial number, and press Replace. Now add the new unit to your network. It doesn't need to be in the same location as the defective unit (branch/loop).
Update devices
On the Devices page, there is also an option to update your devices. Click the Update devices button in the upper right corner and upload the correct .TUF file. Click Update.
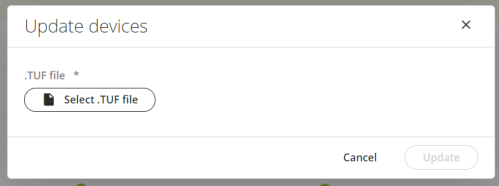
Figure 1-5: Update devices window
Licenses
On the second tab of the Devices menu, you can find the device licences. This page shows an overview of all possible licenses you can activate on the devices. The Licenses page shows the same device information as the Devices page (serial number, device type, replace functionality).
You can activate licenses by selecting the check box next to the header. This activates this license on all devices. You can also activate licenses on individual devices by selecting the check boxes next to the device.
.png)
Figure 1-6: Licenses tab on the Devices page
manage Licenses on the Physical Units 
It is possible to activate licenses directly on the physical units.
-
Click the Room Layout icon
 in the menu on the left and select the Seats tab.
_thumb_0_80.png)
Figure 1-7: Seats tab
-
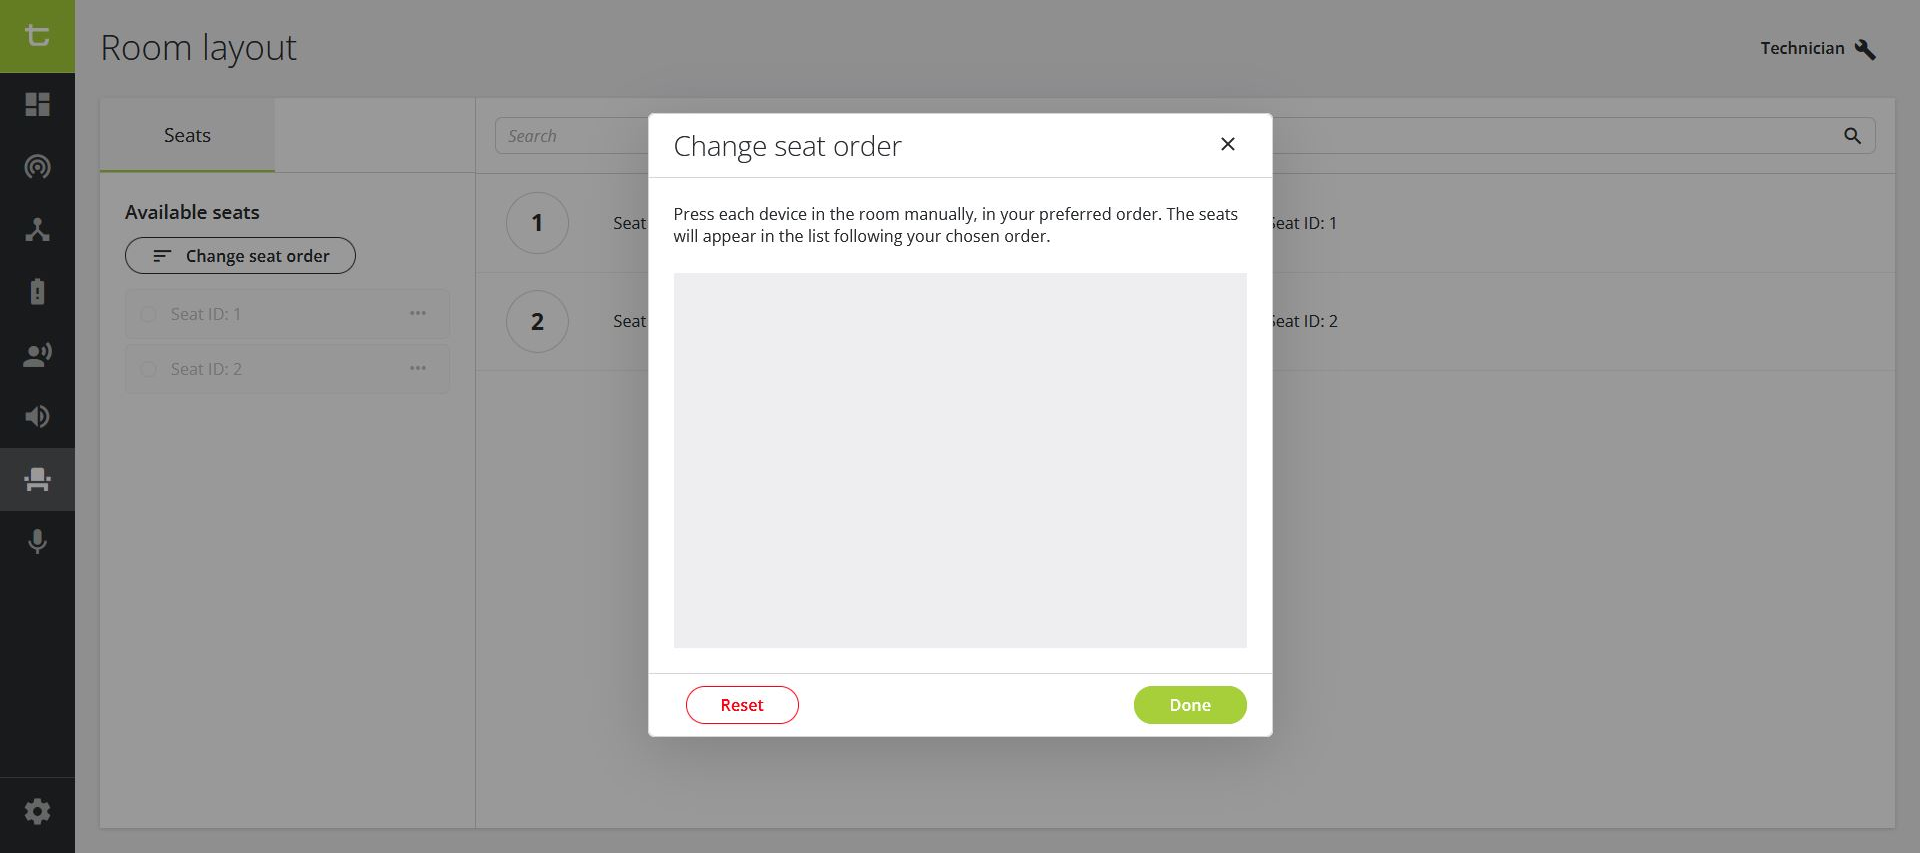
Click on Change seats order.
Figure 1-8: Change seat order pop-up window
-
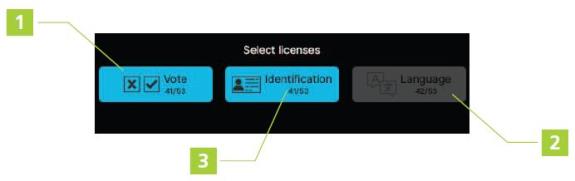
All units now show the License screen.
-
Press the microphone button to initialize the unit, this activates the license screen.
-
Blue buttons: the license is active (1),
-
Grey buttons: the license is inactive (2).
-
Per license, you can see the number of remaining licenses (3).
-
-
Press the license button of your choice to activate or deactivate a license.
.png)
Standby Screen Settings
On the third tab of the Devices menu, you can find the settings for the standby screen on your device. This page shows the image that appears on the screen of your device when no actions such as voting are required. If you have several types of devices, you can pick for which device the image is applicable.
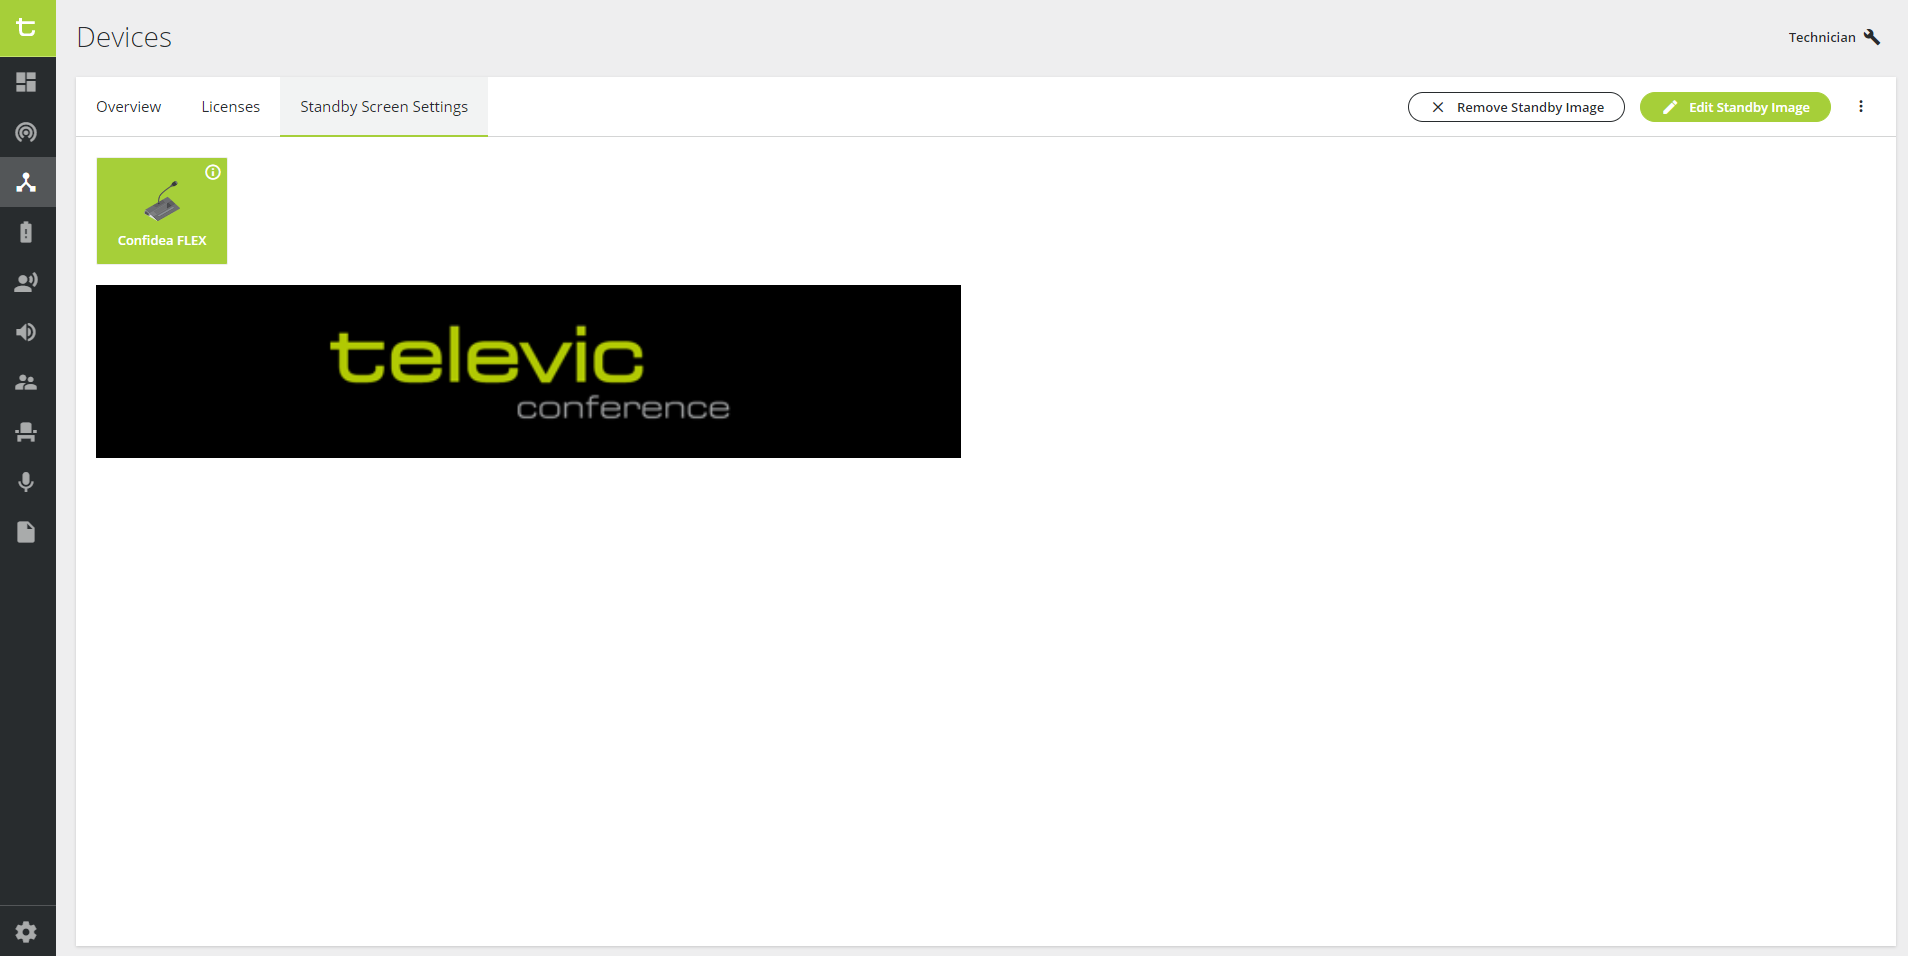
Figure 1-9: Standby Screen Settings tab on the Devices page
If an image is already installed, you can remove it by clicking on Remove Standby Image. The Remove Standby Image window opens. Select the check box next to the device in question, and click on Remove image to delete it.
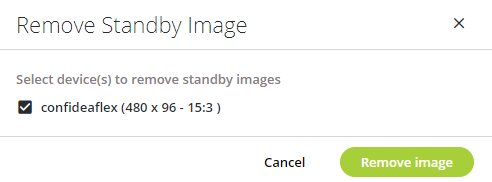
Figure 1-10: Remove Standby Image window
You can change the current image by clicking on the Edit Standby Image button and following the steps on screen.
Step 1: Device Selection
Select the device(s) to edit by selecting the check box next to that device. Then click the Next button.
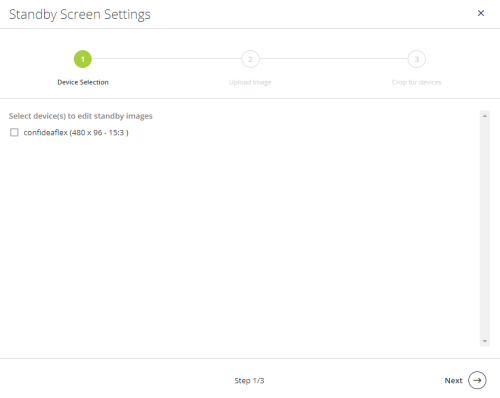
Figure 1-11: Device selection tab in Edit Standby Image window
Step 2: Upload Image
Click on Browse. The file explorer window opens, and you can select the image you want. Then click the Next button
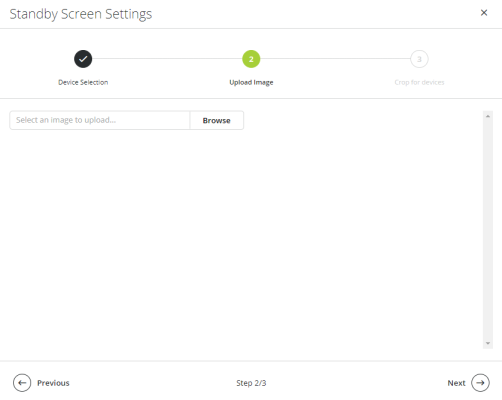
Figure 1-12: Upload Image tab in Edit Standby Image window
Step 3: Crop for devices
After you have uploaded the image, you need to make sure that it fits the screen of the device. If your image is larger than the screen, you can drag and release the image cropper to select which part of the image you want on the screen.
Click the Save button to save your changes. A small pop-up window appears in the right-hand corner to confirm you have successfully uploaded the image. Click the Finish button. The standby image is now updated.
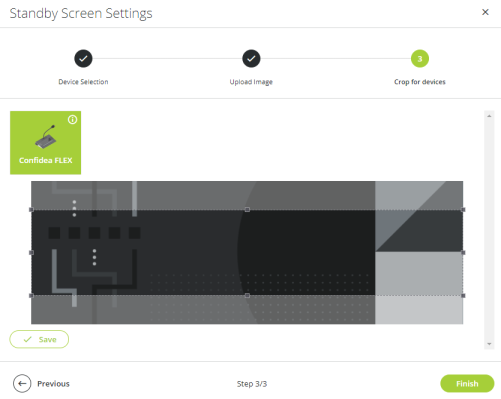
Figure 1-13: Crop for devices tab in Edit Standby Image window