Room Layout
The Room Layout page is the place where you configure your meeting room. More specifically, you can add an image of the actual room where you can then assign seats to the participants. To access this page, click the Room Layout icon in the menu on the left ![]() . This page has two tabs:
. This page has two tabs:
- Background: configures the background image of the meeting room.
- Seats: assign and position the seats inside the meeting room
Background
On the background tab, you can configure the look & feel of the background you see when visualizing your meeting. This is also the image you see on the signage. You can configure two settings:
- Upload background image: upload an image of your meeting room
- Background color: select the color to use as a background of the image you uploaded before
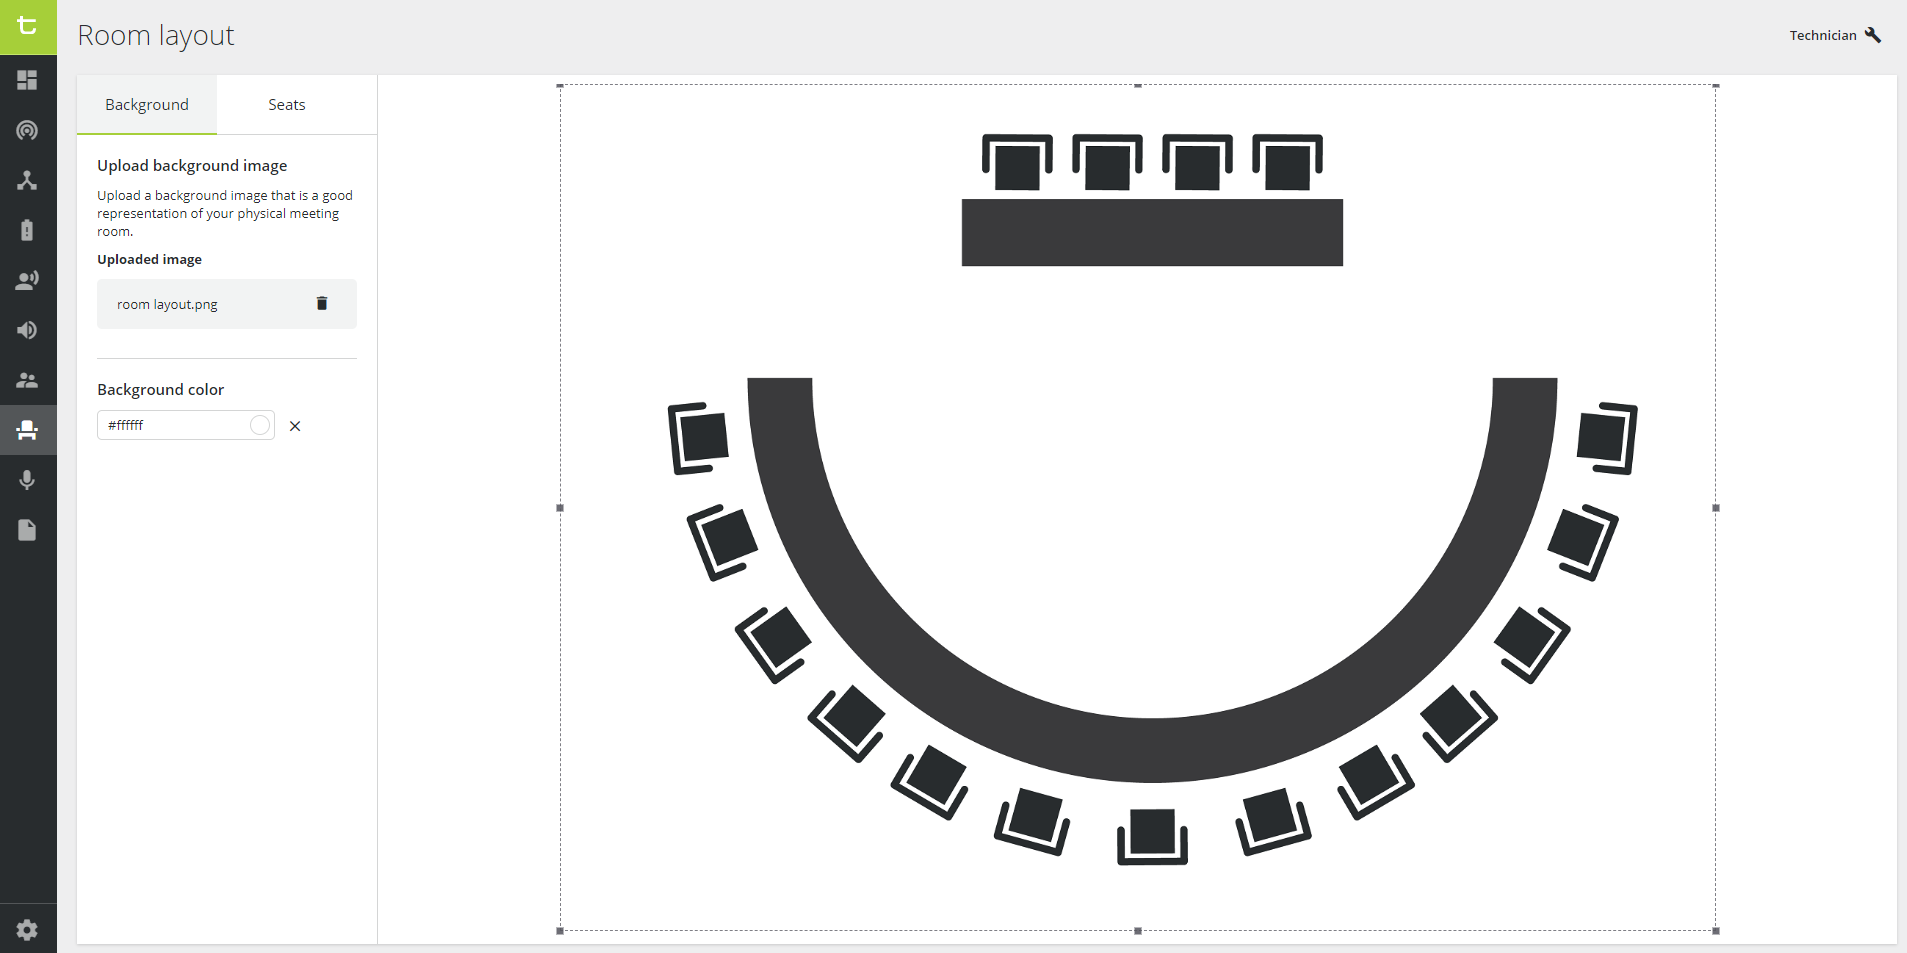
Figure 1-1: Overview background tab in the Room Layout page
All changes are saved automatically.
Seats
Change seat order
On the Seats tab, you can assign seats to the background image. Seats are devices the system detects. The order of these seats is random. However, you can change this order by clicking the button Change seat order. Then press the microphone button of the devices in your room, in the order you want. Click Done, the seat order is now as you defined.
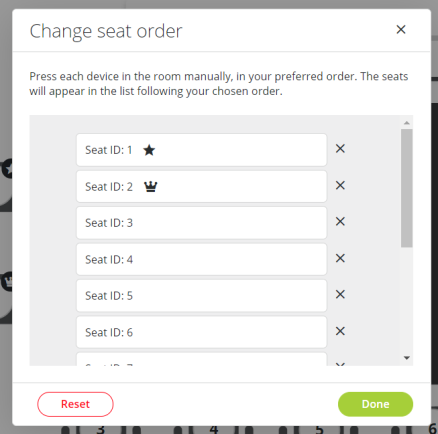
Figure 1-2: Changing the seat order window
Seat priority
On the left side of the screen, you see all available seats (in the order defined by the system or by yourself). To change the priority of the seats, click the more icon ![]() next to it, then click Edit seat. Select the desired priority (Normal, VIP or Chairperson) and click Edit Seat.
next to it, then click Edit seat. Select the desired priority (Normal, VIP or Chairperson) and click Edit Seat.

Figure 1-3: Changing the seat priority window
Normal: priority of a standard meeting participant. Can only activate the microphone if it allows this.
VIP: the participant can activate their microphone at any time
Chairperson: they can activate their microphone at any time, as well as activate and deactivate the microphone of other participants.
Assign seats
The right side of the Seats tab shows the background image with the assigned seats. There are two views:
- Background image view
- List view
Background image view 
This is the default view when navigating to this page. On top of the background image, there is a small menu where you can perform the following actions:
- Show grid: shows a grid over the image to position the seats better.
- Snap to grip: activate if you want to position the seats perfectly on the grid.
- Zoom in/out
To assign seats to the image, you can:
- Drag and drop a seat from the list on the left to the image on the right.
- Place by click: activate this option in the seat list on the left. Then click a spot on the image where you want to position the seat.
List view 
Click the list icon in the right upper corner of the background image. The List view shows all seats as a list. Per seat you can:
- See the seat priority
- See the seat ID
- (De)activate the microphone by clicking the circle with the seat number
- Change the microphone sensitivity (wired systems only
 ) by clicking the seat in the list. A side pane appears with a slider to change the microphone sensitivity.
The Technician sets the default microphone sensitivity value in the system. A reset of the central unit does not reset this value. In the Operator and Chairperson view, the sensitivity is set to 0 dB, but is relative to the value defined in the Technician view.
For example, if the Technician sets the microphone sensitivity to -12 dB, the Operator view shows a value of 0 dB. If the operator sets this to 6 dB, the effective value is -6 dB.
Use the a search bar on top of the list to find specific seats.
.png)
Figure 1-4: List view on the Room layout page